
Ensure the following before you begin:
-
Your device is eSIM compatible and network unlocked. ("Compatible Devices");
-
You have a stable internet connection, preferably WiFi, to download the eSIM properly to your device.
I. Purchase an eSIM
Step 1: Search for a country or region on wanderesim.com.
Step 2: Double-check if your device is eSIM compatible.
Step 3: Make a purchase (you need to be signed in to complete the checkout).
II. Retrieve QR and Activation Codes from Your Account
Step 4: Log in to your Wanderesim account.
Step 5: Go to the "My eSIMs" page.
Step 6: Tap the "Details" button.
Step 7: You will see the QR Code (for QR installation) and/or the SM-DP+ Address & Activation code (for Manual installation). Take a screenshot of the QR Code.
There are two ways to install an eSIM on your device: using the QR Code method and the Manual method. Below are the step-by-step instructions for each method.
III. QR Code Method
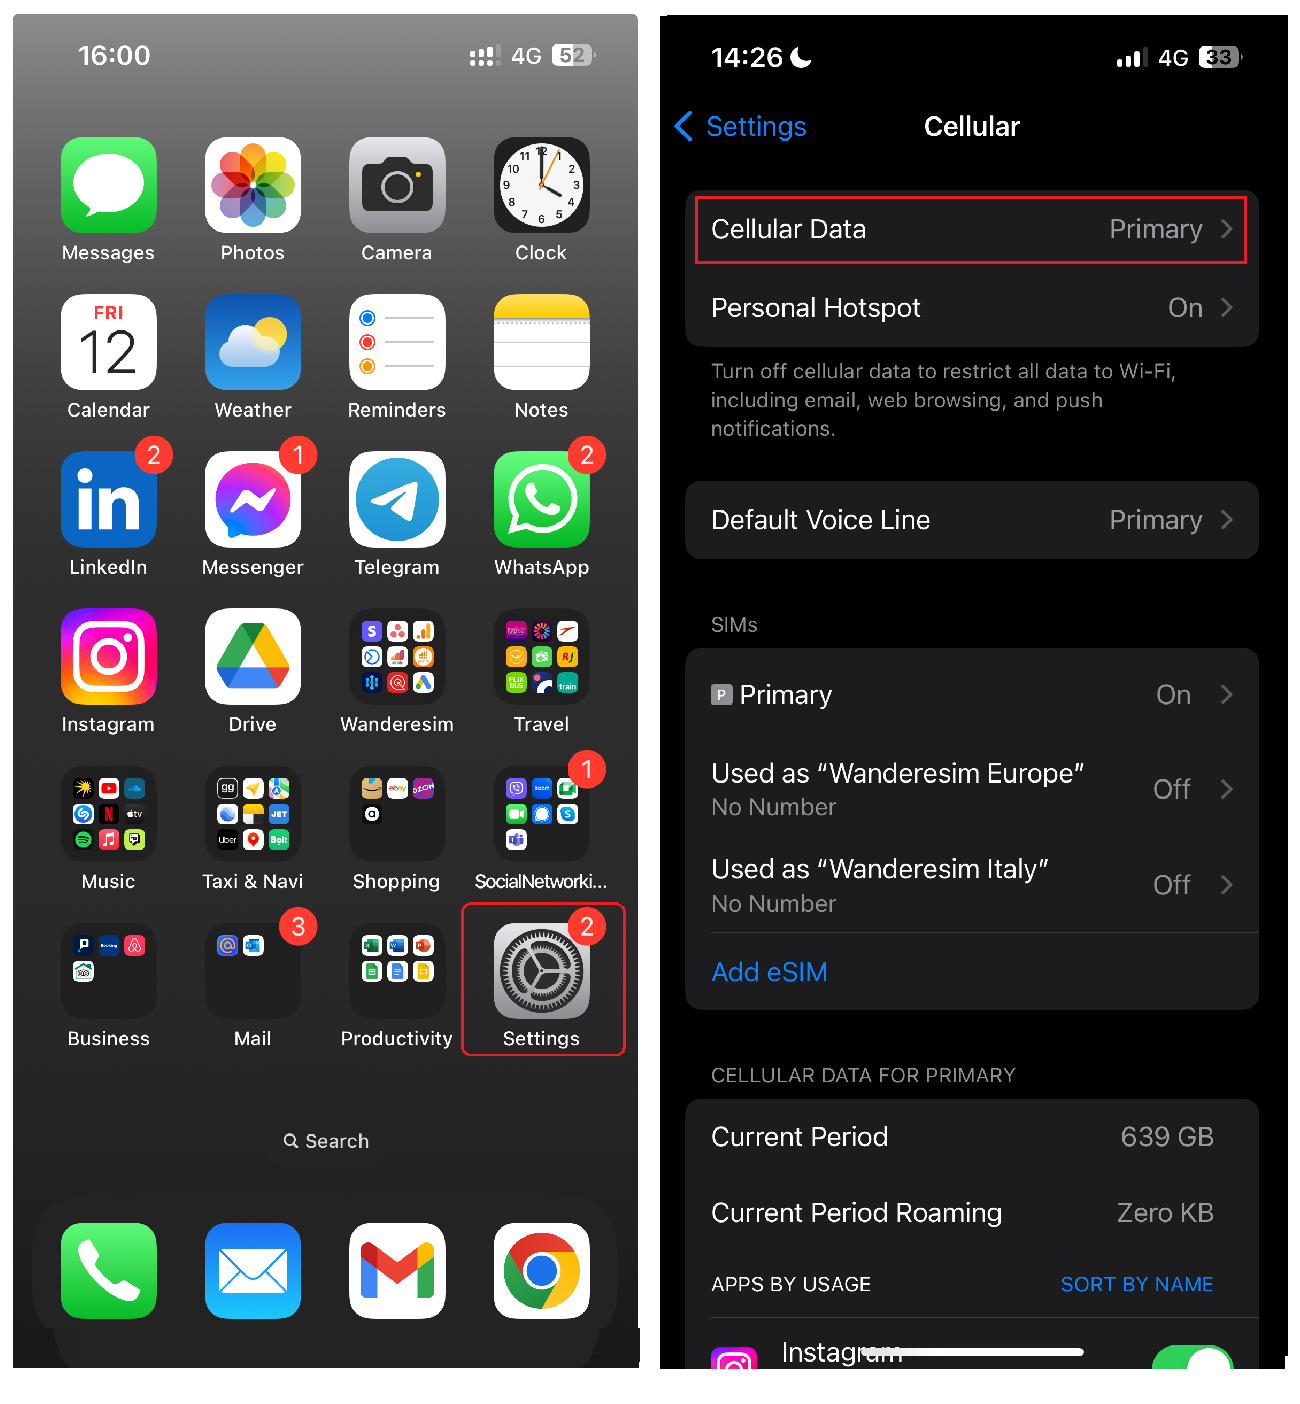
Step 8: On your device, go to "Settings".
Step 9: Tap "Cellular" or "Mobile".
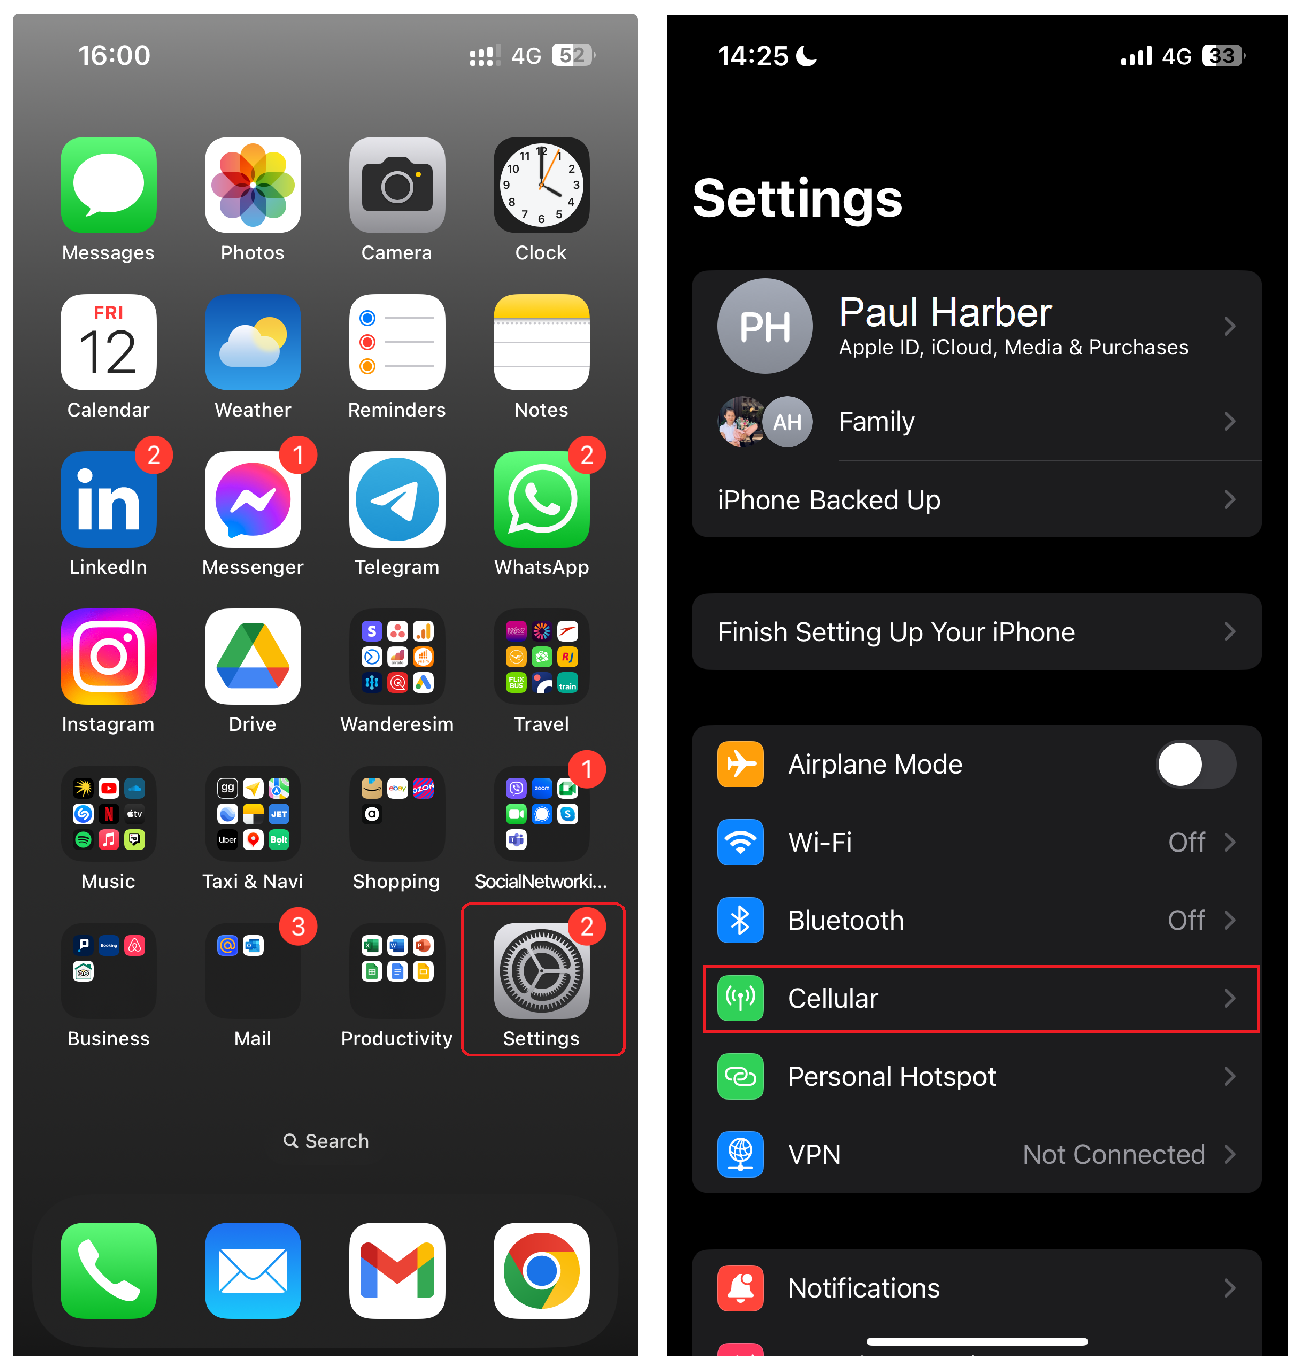
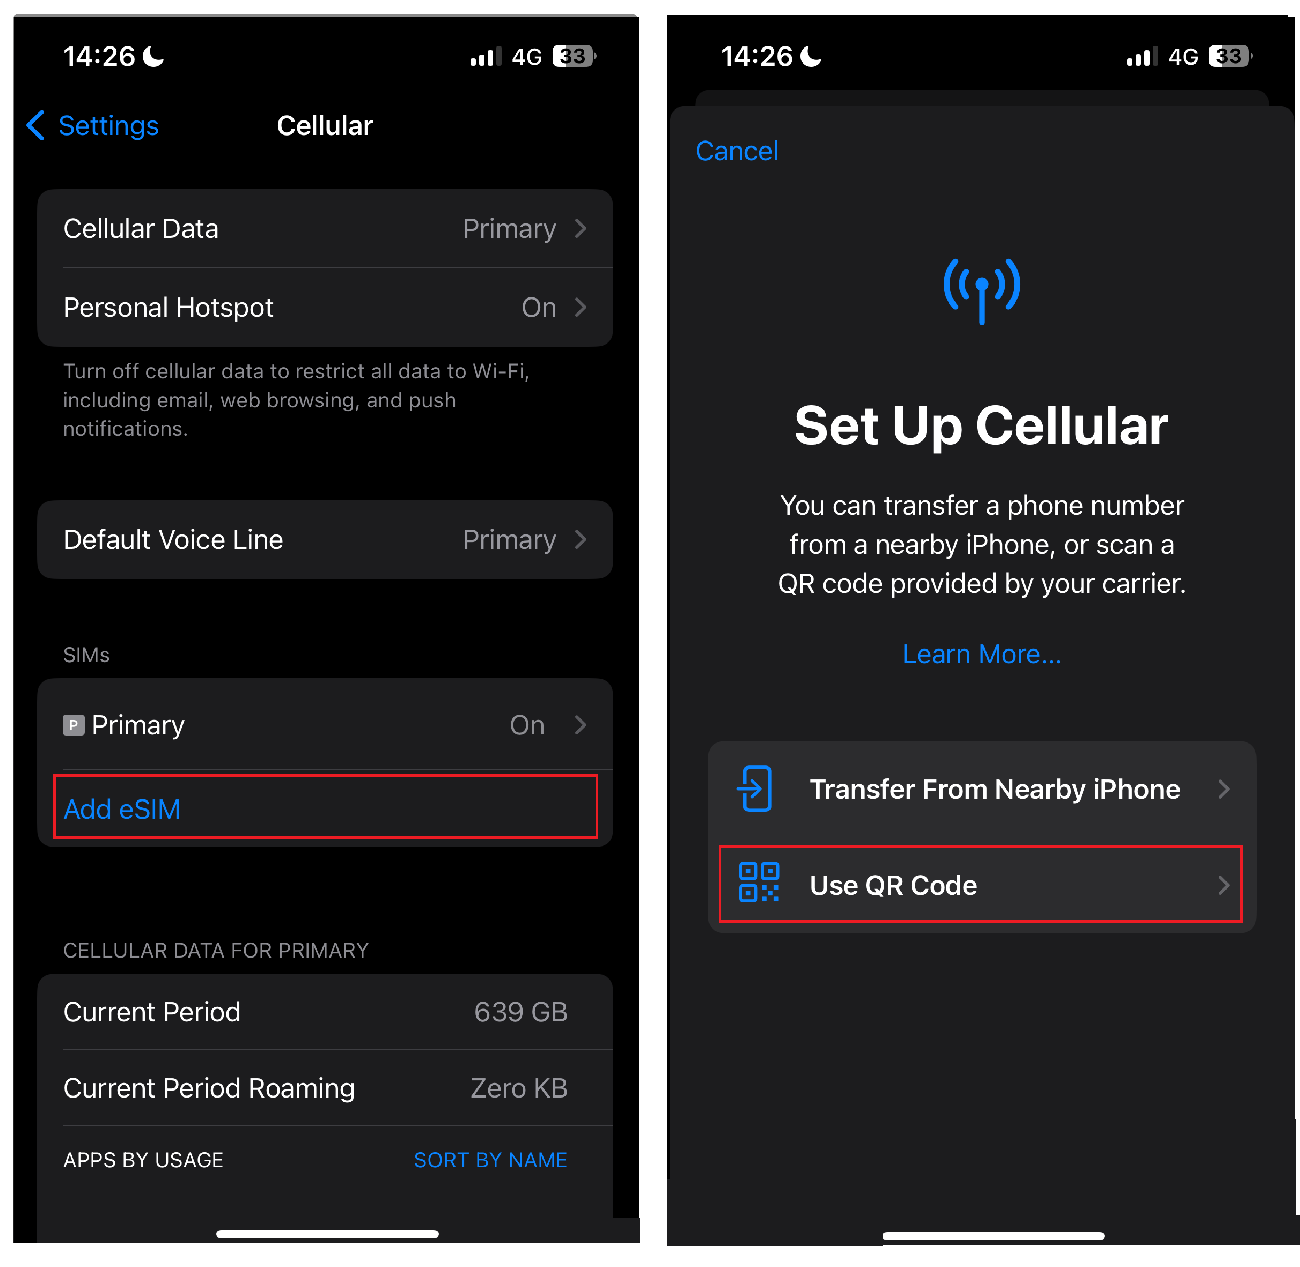
Step 10: Tap "Add eSIM".
Step 11: Select "Use QR Code".
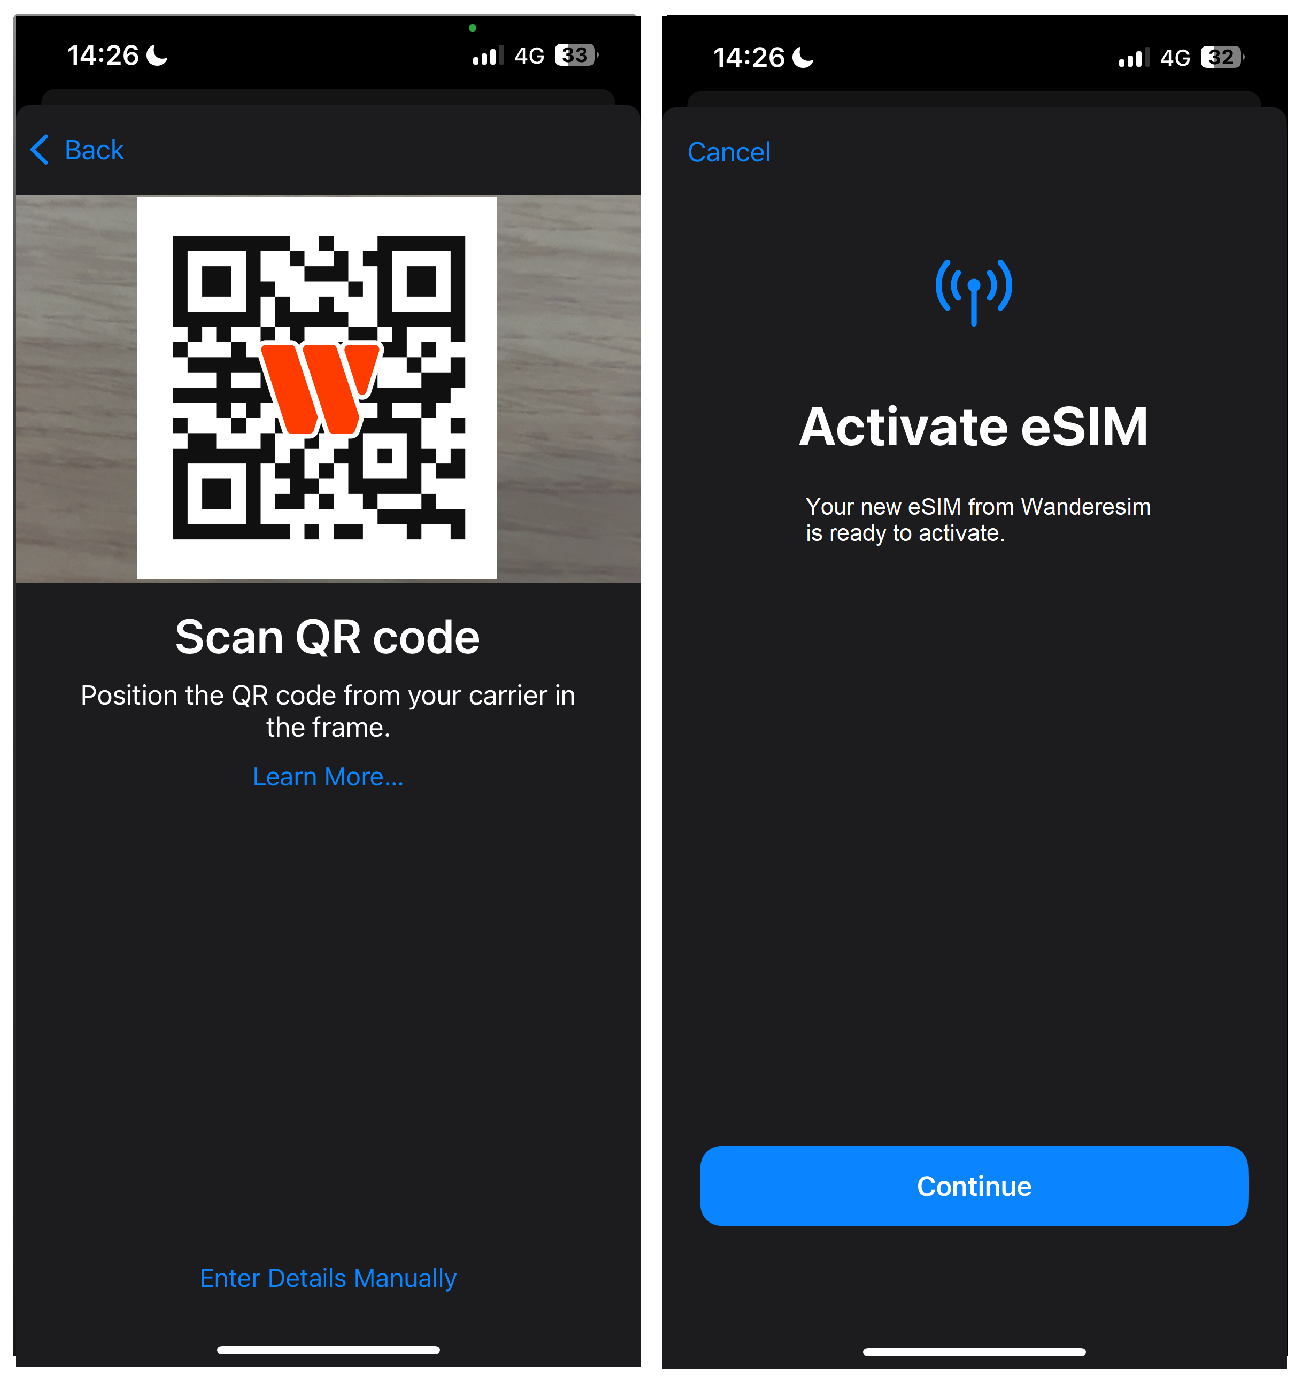
Then open the QR code on another screen or the printed version and scan it.
If prompted, enter the 4-digit confirmation code. Skip the confirmation code step if you are not provided with a code.
Step 11/1: If you want to install manually, then instead of scanning the QR code, select "Enter Details Manually".
You will be asked to enter:
- SM-DP+ Address;
- Activation Code;
- Confirmation Code(if available on your Wanderesim Account). If prompted, enter the 4-digit confirmation code. Skip this step if you are not provided with a confirmation code.
Step 12: The installation process will start automatically when you scan the QR code on your iPhone. Click "Continue".
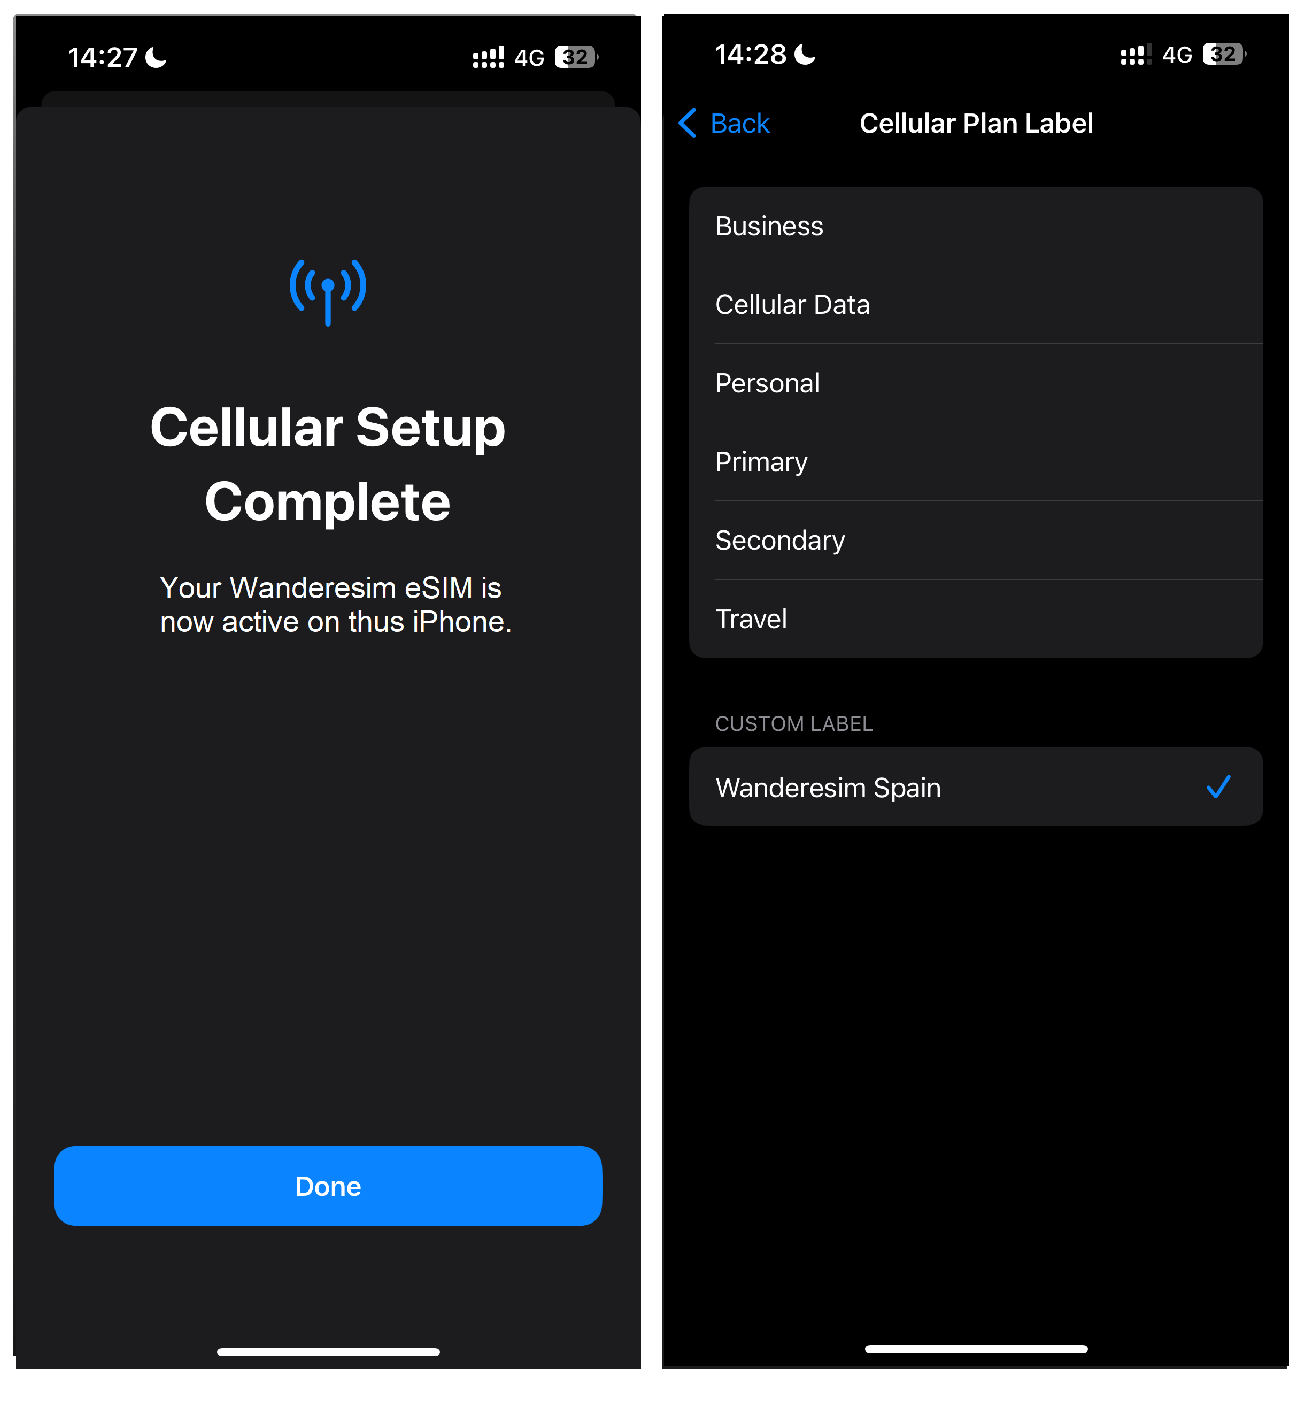
Step 13: Your plan has now been installed. Click "Done".
Step 14: Choose a label and give your new line a name to identify it easily, such as “Wanderesim Spain”. Click "Continue".
Step 15: Choose your default line. Select the “Primary” option to continue using your existing number to receive messages and calls. Click "Continue".
Step 16: For Cellular Data/Mobile Data, select the “Secondary” option, named in the previous screen as “Wanderesim Spain”. IMPORTANT! Keep “Allow Mobile Data Switching” turned off to avoid additional roaming charges. Click "Continue".
Step 17: Your iPhone may activate the plan immediately. To avoid using data before your trip, turn off roaming on all your mobile data plans and turn it on when you have arrived at your destination.
Your plan has now been installed and is ready to be used.
Additional Important Steps
Step 18: You must be at the destination for which you purchased your eSIM.
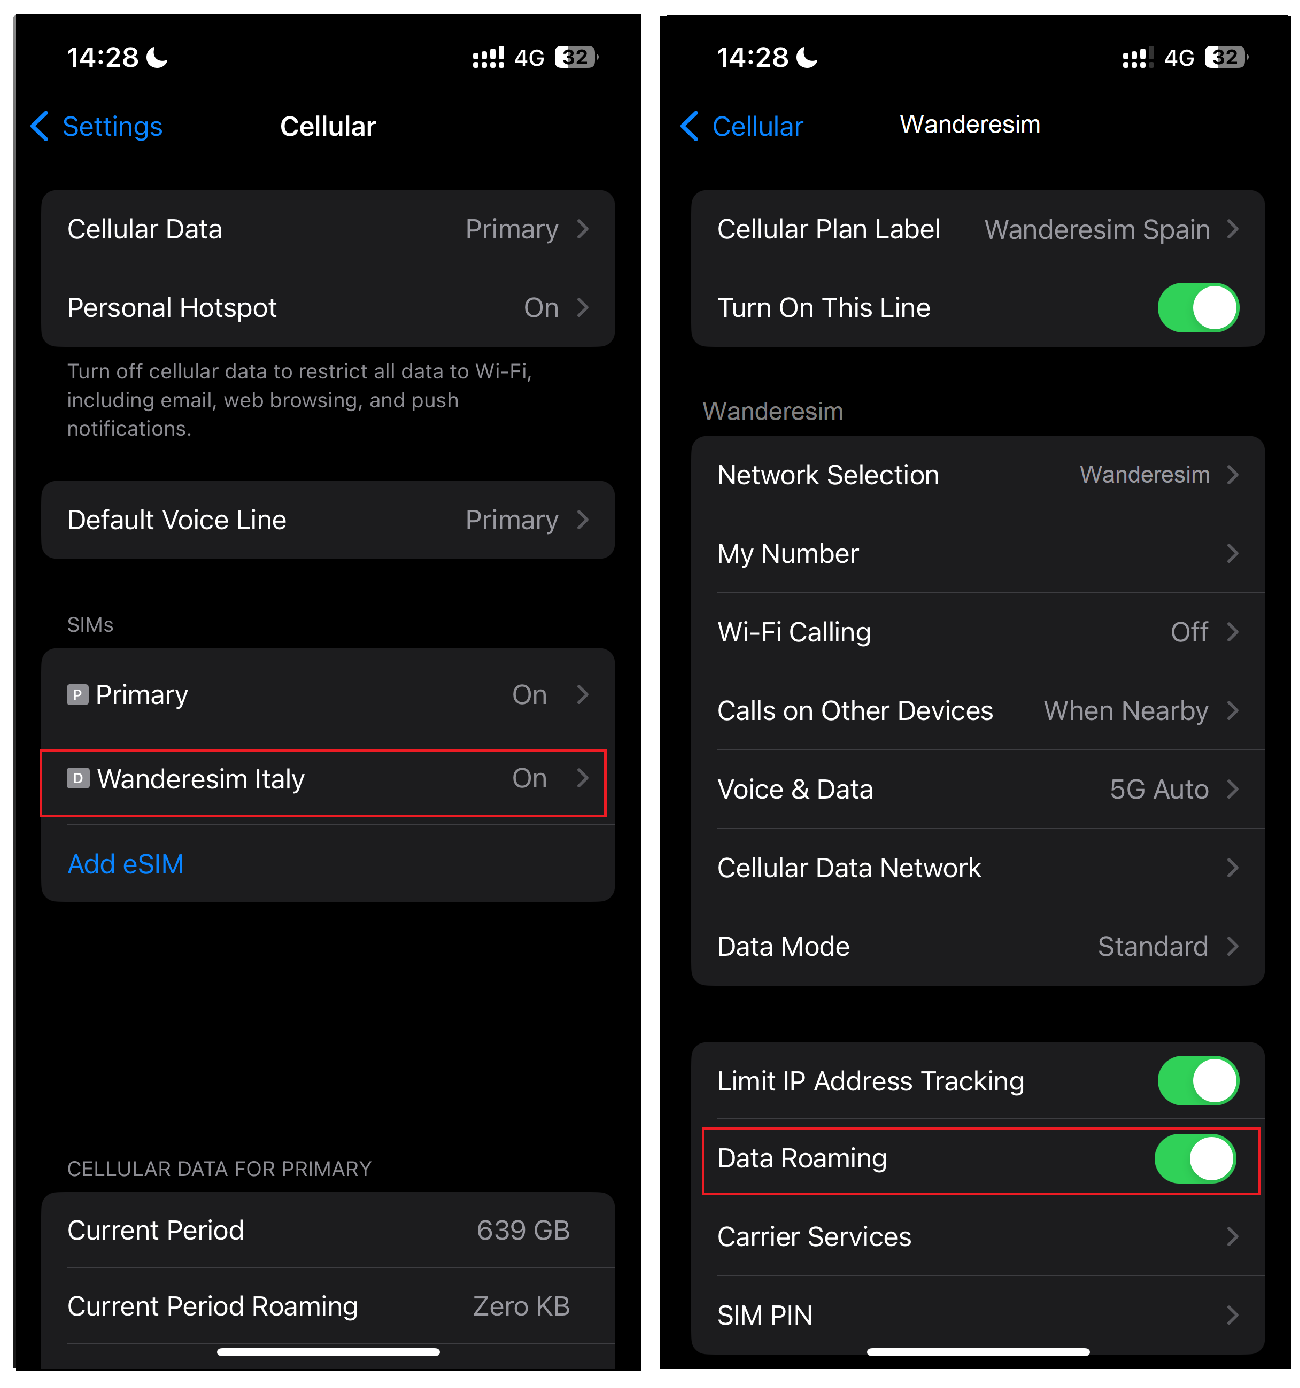
Step 19: Open “Settings” on your iPhone and select “Cellular / Mobile”.
Step 20: Tap “Cellular / Mobile Data”.
Step 21: Select the “Wanderesim Spain” option from the list.
Step 22: In “Cellular / Mobile” select your eSIM “Wanderesim Spain” scroll down until you find “Data Roaming” and turn it ON.
Step 23: Important: DO NOT remove the eSIM from your device as you will not be able to use it again.
Step 24: We recommend downloading this guide as a PDF so you can access the instructions even when you are offline. Download the activation guide.